
As I have mentioned in previous blog posts, my journey into photography has necessitated me learning the art and skills of Adobe Lightroom and Photoshop. I’m starting to feel very comfortable in using Lightroom as my digital darkroom. There are still frustrating times when making some type of adjustment I don’t notice a significant change. This most often happens when I am using the sharpening tool. Another area that frequently causes me some consternation is the Split Toning panel. I have a hard time finding a photo that benefits from this feature. There are a few other minor points that bother me but overall, as I mentioned previously I am getting much more comfortable with Lightroom.
Photoshop is a much more difficult learning exercise. I have purchased a book and looked at numerous videos just to get a basic understanding of how some of the tools work for photography. Most of the photos I have edited with Photoshop have just been attempts to learn how the software works. I can tell that this is going to be a long-term educational saga for me.
Fortunately for me, I recently had an opportunity to use both programs for editing photos to display at my local photography club’s monthly competition. The theme for that competition was abstract photography which by its nature allows for a great deal of freedom in defining what is an abstract photograph. Since this blog post is about my journey to become a better photographer and not a blog for technical instruction; I will just post the photographs that I used, without a lot of detail outlining the editing process that was incorporated into producing them.
The first photograph that I edited was a snippet of mosaic tile from the St. Louis Cathedral in St. Louis, Missouri. The artwork throughout this Cathedral is made up almost entirely of mosaic panels that are stunning. While I was at the Cathedral I took quite a few pictures including a close-up of a small portion of a scene. That photo was edited only using Lightroom. Next, I sent the photo over to Photoshop where several extensive edits were made using layers and filters along with the bloat tool to create the composite image that you see below the original photograph. Much to my surprise, this composite earned a ribbon at the club competition.


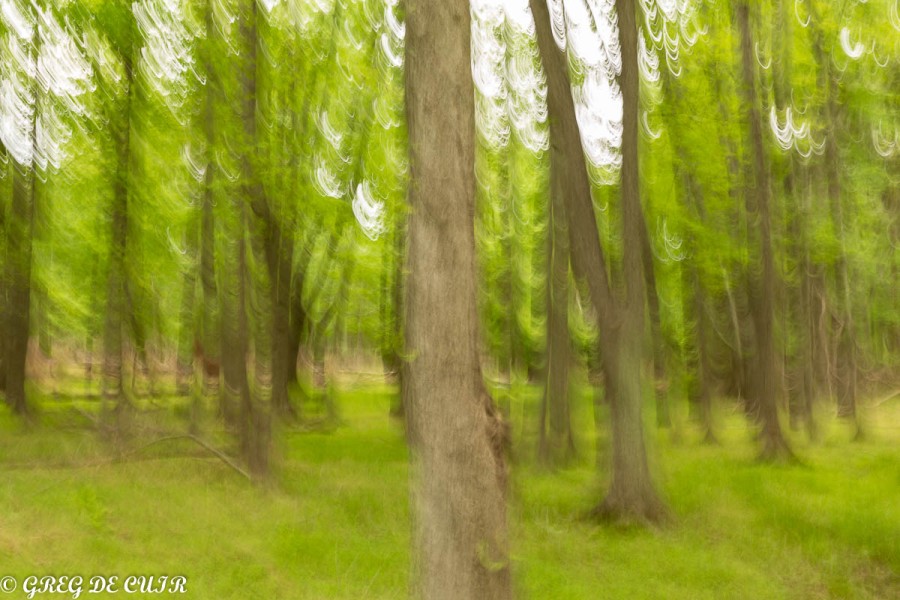
Next photo was taken in the woods behind my home. I deliberately moved the camera as I released the shutter to create a blurred photo of the trees. Again, this photo was only edited in Lightroom. A composite of this photograph was then made using Photoshop. I had previously taken a photo of some plywood with my smart phone. This was used as a texture overlay for the original photo in Photoshop. Both photos can be seen below.

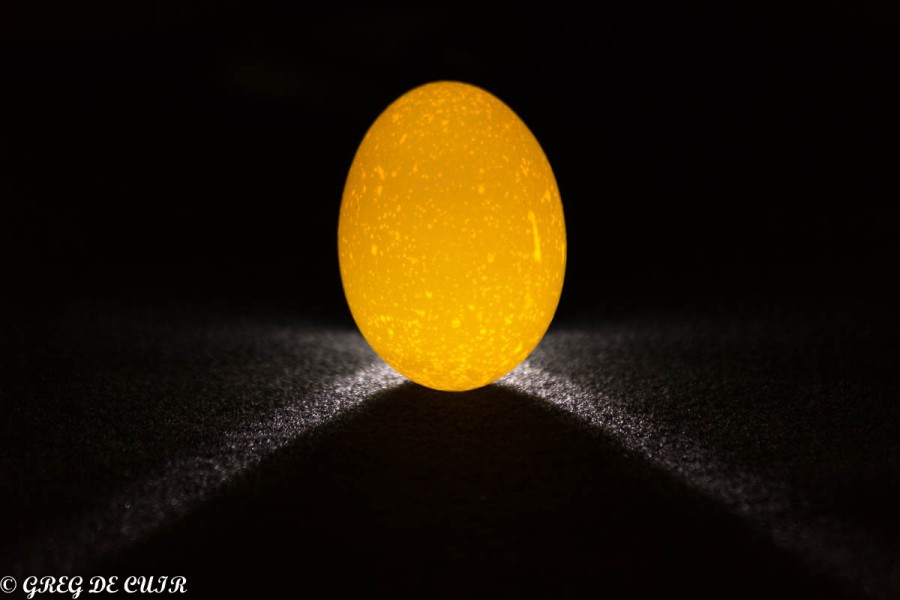
The next photos are that of a chicken egg. To create an abstract photo, a small flashlight was placed directly behind the egg to illuminate the inside of it. This created a very interesting lighting effect because the egg was much more translucent I had expected. The flashlight also created a band of white light beneath the egg that added to the effect. I prefer the black and white version of this photograph for that reason. I was surprised a second time when the black and white photo received a ribbon at the club competition. It was a lot of fun creating this photograph and using the flashlight in different positions. Some of the other photos also turned out quite nice, especially when converted to black and white, but I decided to only use these two in this blog post.

I will continue my attempts to learn photography, Lightroom and Photoshop and hopefully the next photos I post in this blog will show significant improvement in my skill. Please come back to visit www.cestlavie4me.com for future posts.


